How to Use the Lattice Pastry Cutter
Follow these 4 simple steps to create perfect lattice pastry every time.
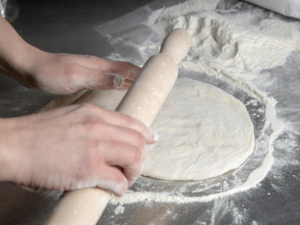
Step 1: Prepare the Dough
Lightly flour your work surface and place a chilled sheet of dough.
Make sure the dough is rolled evenly for the best lattice result.
Dust a bit of flour on the cutter to prevent sticking.
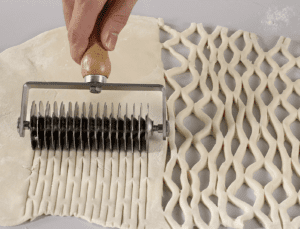
Step 2: Roll the Cutter
Hold the wooden handle firmly and roll the cutter across the dough in one smooth motion.
Apply gentle, even pressure to create clean and consistent cuts.
Roll straight for the best lattice pattern.
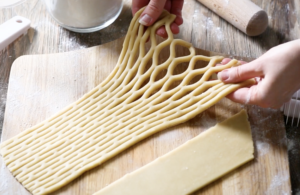
Step 3: Stretch the Lattice
Gently pull the dough apart horizontally to reveal the lattice pattern.
If needed, use a small amount of flour to prevent sticking during stretching.
The dough should open naturally into a clean, decorative lattice.
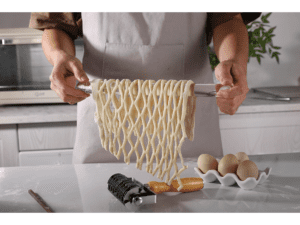
Step 4: Transfer & Finish
Use a spatula to lift the stretched lattice and place it gently over your pie or pastry.
Trim the edges as needed and crimp to secure the top crust.
Bake according to your recipe and enjoy a beautiful, professional lattice finish!
✨ Tips for Best Results
- Use well-chilled dough for cleaner cuts.
- Flour the cutter lightly to prevent sticking.
- Roll once with steady pressure — avoid multiple passes.
- Hand wash recommended to preserve the wooden handle.